
What is React?
React is a library that allows developers to build user interfaces for web applications using JavaScript. It provides a set of tools and components that enable the creation of interactive and dynamic UIs. With React, developers can create reusable UI components and efficiently update them based on changes in data or application state. React focuses on efficiently rendering the UI by using a virtual DOM and minimizing direct manipulation of the browser’s DOM, which results in better performance and responsiveness. [1]
React can be considered a view library because it primarily focuses on the presentation layer of an application. It provides a way to represent the UI components and their state in a declarative manner. Developers can define how the UI should look at any given point in time based on the current state or data. React takes care of efficiently updating and rendering the UI based on the changes in the underlying data or state. By separating the UI logic into reusable components, React makes it easier to manage and maintain the views of an application, promoting code reusability and modularity.
How to create React application?
There are two ways to create react application:
1. Creating a React application using Create React App (CRA) or Vite:
a). Create React App:
Create React App (CRA) is a popular tool for bootstrapping React applications. It sets up a preconfigured React project with all the necessary dependencies and builds scripts.
To create a React application using CRA, open your terminal or command prompt and run the following command:

With this command, the initial project files and dependencies will be created in a new folder called “react-test-project”. It will automatically install the necessary packages and configure the project structure for you.
b) Vite:
Vite is another build tool specifically designed for fast development and optimized builds. It can be used to create a React application with minimal configuration.
To create a React application using Vite, open your terminal or command prompt and run the following commands:
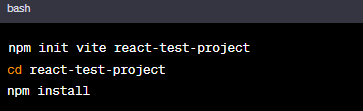
This will create a new folder called “react-test-project” and initialize a new Vite project with React. It will also install the necessary dependencies.
2. Creating a React application manually
Creating a React application manually involves setting up the necessary configuration files and installing the required packages yourself. Here are the basic steps:
a) Initialize the project:
Open your terminal or command prompt and navigate to the desired project directory. Run the following command to initialize a new npm project:
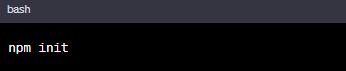
This will create a new ‘package.json’ file that keeps track of your project’s dependencies and scripts.
b) Install React and other dependencies:
Run the following command to install React and other required dependencies:
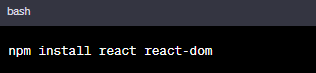
This will install React and React DOM as dependencies for your project.
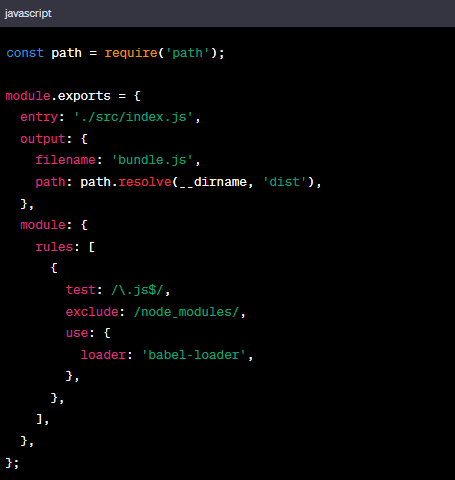
c) Create configuration files:
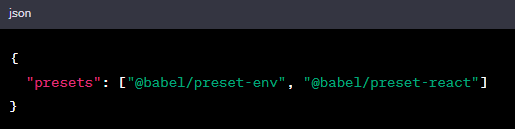
Create a ‘.babelrc’ file to configure Babel, a tool for compiling JavaScript code. Inside the ‘.babelrc’ file, you can include presets and plugins to support modern JavaScript syntax and React. Here’s a basic example:
Create a ‘webpack.config.js’ file to configure Webpack, a module bundler. This file defines how your project’s assets and code will be bundled. Here’s a simple example of bundling React:
d) Set up your project structure:
Create a ‘src’ directory and an ‘index.js’ file inside it. This will be the entry point of your React application. You can start writing your React code in this file.
e) Start the development server:
To see your React application in action during development, you need to start the development server. You can use a tool like webpack-dev-server or any other development server of your choice. Run the following command to start the server:
Suppose this is your package.json
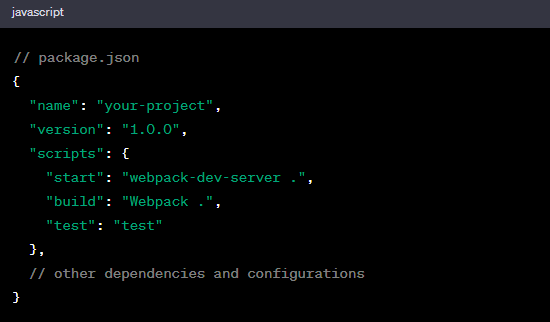
To start the server: npm start
and for the build: npm run build
These are the basic steps to create a React application manually. However, note that this approach requires more manual configuration and setup compared to using tools like Create React App or Vite.
Component Type
There are two kinds of components in React: functional components and class components. Both types serve the same purpose of defining reusable UI elements, but they differ in their syntax and usage.
1. Class Components:
Class components, also known as stateful components or class-based components, are ES6 classes that extend the `React.Component` class. Class components allow you to define more complex behaviour by managing their state and utilizing lifecycle methods such as `componentDidMount`, `componentDidUpdate`, and `componentWillUnmount`.
Here’s an example of a class component in React:
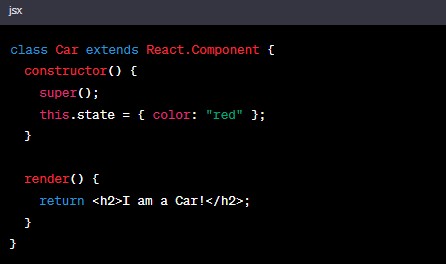
Class components use the `render` method to define the component’s structure and appearance. They have access to their state through `this.state` and can modify it using `setState()`. Class components also receive props as an argument and can use them to customize their behaviour.
2. Functional Components:
Functional components, also known as stateless components or functional stateless components, are JavaScript functions that return JSX (JavaScript XML) to define the structure and appearance of a component. Functional components were typically used for presentational purposes and didn’t have their own internal state or lifecycle methods. But now it is possible to use state in functional components With React v16.8.
Here’s an example of a functional component in React:
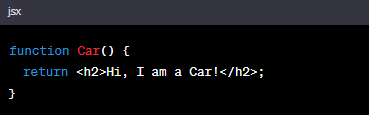
Functional components receive properties (props) as an argument and can use them to customize their behaviour or display different content based on the input.
Lifecycle methods
In React, class components use lifecycle methods, while functional components utilize the ‘useEffect’ hook to achieve similar functionality.
1. Class Components:
- Initialization: This is the stage where the component is constructed with the given Props and default state. This is done in the constructor of a Component Class. ‘constructor()’
- Mounting: Mounting is the stage of rendering the JSX returned by the render method itself.
- componentWillMount() Function: this function is invoked right before the component is mounted on the DOM i.e. this function gets invoked once before the render() function is executed for the first time.
- componentDidMount() Function: Similarly to the previous one this function is invoked right after the component is mounted on the DOM i.e. this function gets invoked once after the render() function is executed for the first time
- Updating: Updating is the stage when the state of a component is updated and the application is repainted.
- componentWillReceiveProps() Function: This is a Props-exclusive Function and is independent of States. This function is invoked before a mounted component gets its props reassigned. The function is passed the new set of Props which may or may not be identical to the original Props.
- setState() Function: This function is used to update the state of a component.
- shouldComponentUpdate() Function: By default, every state or props update re-renders the page but this may not always be the desired outcome, sometimes it is desired that updating the page will not be repainted. The shouldComponentUpdate() Function fulfils the requirement by letting React know whether the component’s output will be affected by the update or not. shouldComponentUpdate() is invoked before rendering an already mounted component when new props or states are being received. If returned false then the subsequent steps of rendering will not be carried out.
- componentWillUpdate() Function: This function is invoked before the component is rerendered i.e. this function gets invoked once before the render() function is executed after the updation of State or Props.
- componentDidUpdate() Function: Similarly, this function is invoked after the component is rerendered i.e. this function gets invoked once after the render() function is executed after the updation of State or Props.
- Unmounting: As the name suggests Unmounting is the final step of the component lifecycle where the component is removed from the page.
- componentWillUnmount() Function: This function is invoked before the component is finally unmounted from the DOM
2. Functional Components with Hooks:
Functional components, when combined with React Hooks, provide similar functionality to class components’ lifecycle methods in a more concise and declarative way. The ‘useEffect’ hook is primarily used for handling side effects and mimicking the behaviour of lifecycle methods.
UseEffect Hook
‘useEffect’ is a built-in hook that allows you to perform side effects in functional components. Side effects refer to actions that occur outside of the component’s rendering, such as fetching data from an API, subscribing to event listeners, manipulating the DOM, or setting up timers.
The ‘useEffect’ hook is used to manage these side effects by specifying a callback function to be executed after every render. The callback function is run after the component has rendered or re-rendered, allowing you to perform tasks that require access to the component’s updated state or props.
Here’s the basic syntax of the ‘useEffect’ hook:
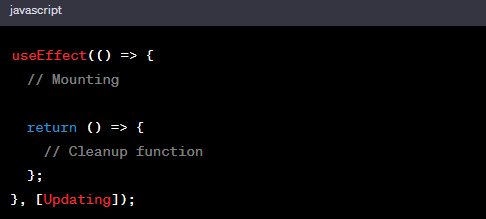
The ‘useEffect’ function takes two arguments: the callback function and an optional array of dependencies. The dependencies array specifies values that the effect depends on. When any of the values in the dependencies array change, the effect will be re-run. If the dependencies array is empty, the effect will only run once, after the initial render.
It’s important to note that the cleanup function returned by ‘useEffect’ is called when the component is unmounted or when the dependencies change and the effect is re-run. This cleanup function allows you to cancel subscriptions, clear timers, or perform any necessary cleanup tasks.
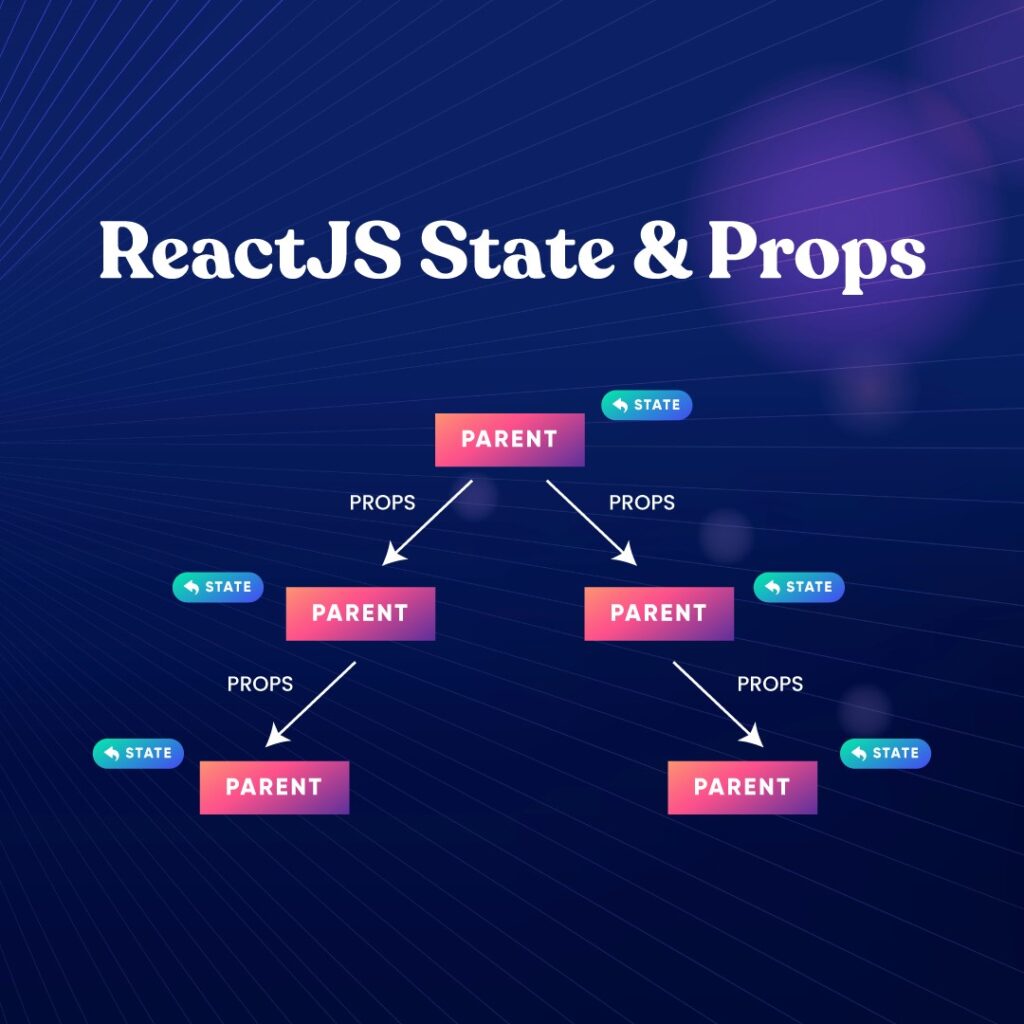
ReactJS State and Props
A big confusion for front-end developers when learning React is understanding the difference between state and props. React can manage the data and render the application properly as the data changes. There are two main ways to think about data: props and states.
ReactJS State
In ReactJS, the state is a built-in feature that allows you to manage and store data within a component. The state represents the mutable values that can influence the component’s behaviour and rendering. By using state, you can create dynamic and interactive components that can update and display data based on user interactions or other events.
To work with the state in React, you typically use the useState hook, which is one of the built-in hooks provided by React. Here’s an example of how to use useState to manage state in a functional component:
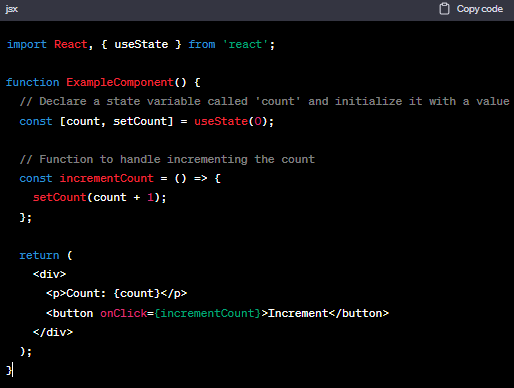
The state can hold any type of data, such as numbers, strings, objects, or arrays. You can have multiple state variables within a component to manage different pieces of data.
It’s important to note that the state is local to a component and does not affect other components unless explicitly shared or passed down as props. Each component manages its state independently.
By using state, you can create dynamic and interactive React components that respond to user interactions and reflect changes in data. It is a fundamental concept in React for building robust and interactive user interfaces.
ReactJS Props
In ReactJS, props (short for properties) are a way to pass data from a parent component to its child components. Props are read-only and cannot be modified by the child component. They are used to customize the behaviour or appearance of a component based on the values provided by its parent component.
To pass props to a child component, you can simply include them as attributes when rendering the child component. For example:
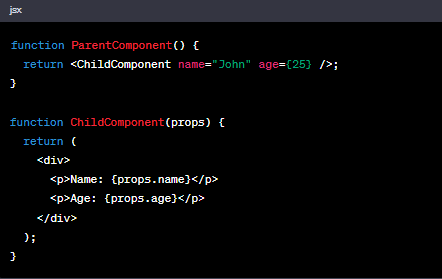
Props can hold various data types, such as strings, numbers, booleans, objects, or even functions. They provide a way to pass data down the component tree, allowing components to communicate and share information.
Props are useful when you want to create reusable and configurable components. By passing different props to the same component, you can customize its behaviour and appearance based on specific requirements. This promotes component reusability and makes your code more modular and maintainable.
It’s important to note that props flow in a one-way direction, from parent to child components. If a component needs to communicate back to its parent or share data with other components, you can utilize callbacks or state management libraries like Redux or Context API.
Overall, props play a crucial role in ReactJS, enabling the composition and customization of components, and facilitating the building of flexible and reusable user interfaces.
What is prop drilling?
Prop drilling is the process of passing props through multiple intermediate components to reach a deeply nested component that needs access to those props. It occurs when a parent component passes props to its child component, which then passes them down to its child component, and so on until the props reach the desired component. It can lead to code complexity, reduced maintainability, and decreased code readability. However, there are ways to avoid prop drilling, such as using Redux and the useContext hook.
ReactJS useContext Hook
The useContext hook is a built-in hook in React that allows components to consume values from a Context without the need for nested prop passing. It provides a more convenient way to access shared data across different components in a React application.
Here’s an example of how to use the useContext hook:
1. Create a Context:
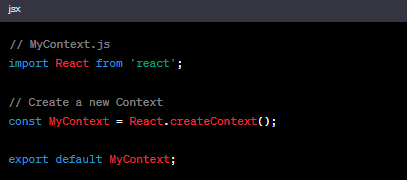
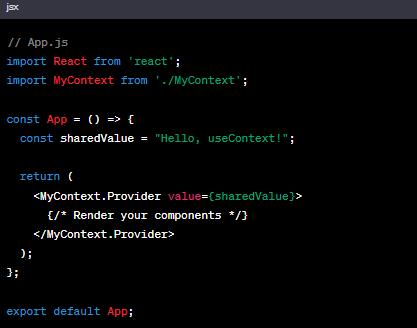
2. Provide a value to the Context:
3. Consume the Context value in a component:
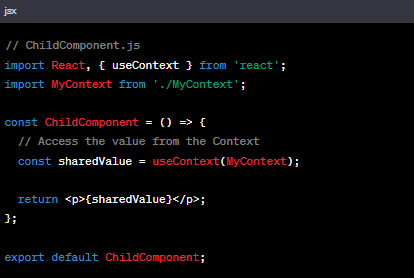
In this example, the value “Hello, useContext!” is provided to MyContext using the `Provider` component in the App component. The ChildComponent then consumes the value using the useContext hook.
By using the useContext hook, you can avoid prop drilling and access shared data from any component within the Context’s provider hierarchy. It simplifies the process of passing data down through multiple levels of components and makes the code more readable and maintainable.
Custom Hooks
Custom hooks are a powerful feature in React that allows you to encapsulate reusable logic and stateful behaviour in a reusable function. They enable you to abstract away complex logic and share it across different components, promoting code reusability and maintainability.
To create a custom hook, follow these steps:
- Identify the logic or behaviour that you want to encapsulate. It could involve state management, API calls, event handling, or any other reusable functionality.
- Create a new JavaScript function starting with the “use” prefix. This naming convention is important because it allows React to recognize it as a hook. For example, `useCustomHook`.
- Inside the custom hook function, define any state variables, helper functions, or other logic needed for the desired behaviour.
- Optionally, return any values or functions that you want to expose to the components using the custom hook.
- Use the custom hook in your components by calling it like any other hook. The components will have access to the state and functions provided by the custom hook.
Here’s an example of a custom hook that manages a simple counter:
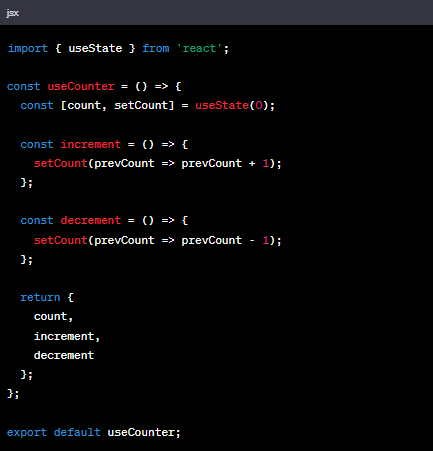
In this example, the `useCounter` custom hook manages the state of the counter (`count`) and provides two functions (`increment` and `decrement`) to update the count.
To use this custom hook in a component:
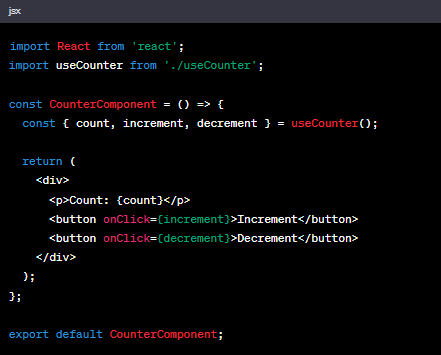
By using the `useCounter` custom hook, the `CounterComponent` can easily access the count state and the increment and decrement functions without needing to implement the state management logic in the component itself.
Custom hooks offer a way to share and reuse complex logic across multiple components, promoting a modular and reusable codebase. They are a powerful tool for abstracting away common patterns and behaviours in React applications.
Closing Thoughts
In conclusion, React offers a robust and efficient approach to building dynamic web applications. By understanding its core concepts, component types, lifecycle methods, hooks, and the concepts of state, props, and context, you are equipped to create engaging and interactive user interfaces. Whether you are a beginner or an experienced developer, React provides a solid foundation for building modern web applications with ease and scalability.